You can use the Swap Image behavior to create rollover images for links and navigation elements, and you can use it to add a little surprise to your pages anywhere in your web site by setting one image to swap with another image.
Follow these instructions to create an image rollover effect in Expression Web:
1. Begin by inserting the first image you want to display in your rollover into your page just as you would insert any other image. For example, you can choose Insert > Picture > From File and browse to find the image you want to insert.
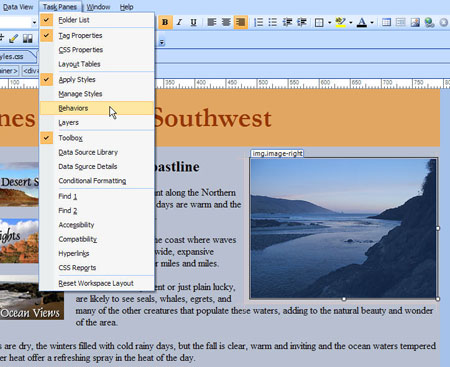
Add any formatting or alignment options you want, such as the .image-right class style that is applied to the image in this example to align it to the right side of the page. Note: You’ll find instructions for the creating and applying an image-right style in Tutorial 5.)
Once you have the image the way you want it, click to select the image and open the Behaviors task pane by choosing Task Panes | Behaviors.

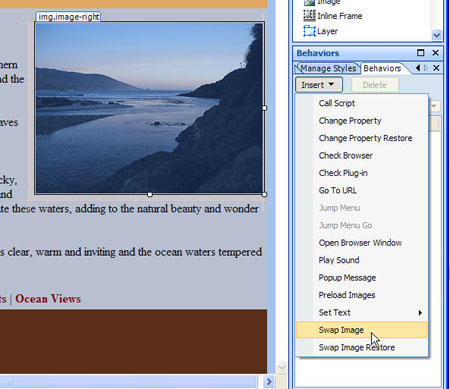
2. Click on the arrow to open the pull-down list and choose Swap Image.

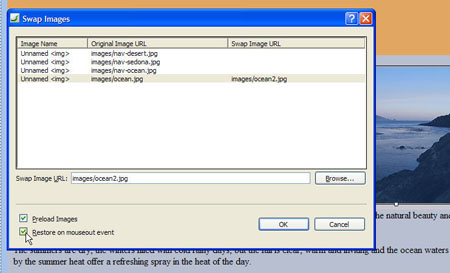
3. In the Swap Image dialog, use the Browse button to find the image you want to replace, or swap, with the first image, select it and click OK.
Make sure to check the Restore on Mouseout event box. This will replace the second image with the first when the user moves their cursor off the image.

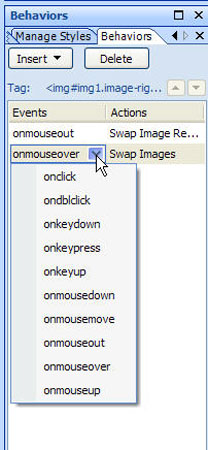
4. Click OK and the rollover image is automatically set using Javascript to control the event and action. Note that you can change the event, which in this case is set to onmouseover, by clicking on the arrow in the Behaviors task pane next to the event and choosing another option from the pull-down list.

The swap image behavior makes it easy to create cool rollover effects anywhere in your site and it can be used to swap more than one image simultaneously to create even more complex image effects.
