Over the years, web design has evolved into an increasingly complex field, and Dreamweaver has evolved with it, adding features that go way beyond the basics of combining a few words and images. Adobe’s dedication to keeping up with changing standards and adding new features with each new version is why Dreamweaver is such a popular program among professional web designers, as well as among a growing number of people who want to build sites for their hobbies, clubs, families, and small businesses.
The newest features in Dreamweaver CS6 make it easier to create web pages and applications for mobile devices, as well as desktops, and to add the latest design enhancements made possible by HTML5 and CSS 3. From the relatively minor addition of the new Web Fonts Manager, to the significant addition of the Fluid Grid Layout system, there are many reasons to upgrade to Adobe Dreamweaver CS6.
1. Fluid Grid Layouts make it easier to create websites for mobile, tablet, and desktop screens
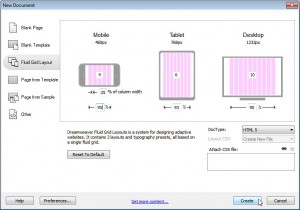
The new Fluid Grid Layout system in Dreamweaver CS6 makes it easier to create websites that use responsive design (also called adaptive design). The idea is that you create one web page and then use three sets of style rules to adapt the design so that it fits on different screen sizes — such as on a desktop monitor, a tablet, or a smartphone.
Dreamweaver’s Fluid Grid Layout tools give you a head start on this complex design strategy by combining a grid system which automatically handles all the complicated calculations you need in adaptive designs, with media queries, which match the best style sheet to each device.
You’ll find the new Fluid Grid Layout option under the File menu. You’ll also find it in a new category in the New Document Window.
Remember, the key to creating responsive designs is to position the same divs for best display in each of the three layouts. For example, in the mobile version, the best practice is to create a single-column layout, but in the tablet and desktop versions, you may want to position the same divs to create two or more columns.
(Learn how to create responsive designs with fluid grid layouts)
2. Add Fancy Fonts with Dreamweaver’s Web Fonts Manager
The few fonts that come installed on most Windows and Mac computers have long struck web designers as woefully inadequate. That’s why so many of us are excited about the @font-face tag, which makes it possible to link to any font available from a web server.
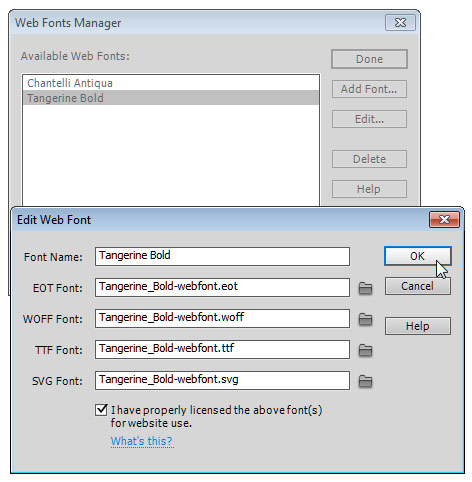
Using the @font-face rule requires two steps. First you link to a font hosted on a web server, and then you use that font in the font-family rule in your CSS styles. Dreamweaver’s new Web Fonts Manager makes it easier to use your own fonts when you create styles, because Web Fonts Manager makes it possible to add your own fonts to the font-family list in the CSS Rule Definition dialog.
To use this new feature in Dreamweaver CS6, choose Modify > Web Fonts, and then click on the Add Font button in the Web Fonts Manager dialog window.
Note: If you use Typekit, which was recently acquired by Adobe, you don’t need to host your own fonts and, you won’t need to use the new Web Fonts Manager in Dreamweaver. With Adobe Typekit, you create a collection of the fonts at Typekit.com, add a little code to your web pages, and then simply use them in your styles.
3. Add Text Shadows, Gradients, and Rounded Corners with the CSS Styles Pane
Although Adobe added features for the most popular CSS 3 design options to Dreamweaver CS5.5, I’ve included a couple of quick tips about where to find them so that you don’t miss these important additions when you upgrade to CS6.
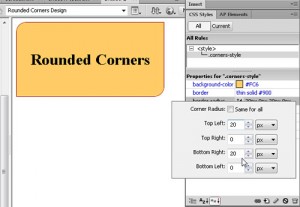
These new CSS 3 tools are easy to miss, because they’re only available from the CSS Styles pane. To use them, click to select the name of any existing style in the CSS Styles panel, and in the CSS Properties pane below, click to Add Property. Dreamweaver’s properties list now includes most CSS 3 properties, including text-shadow, box-shadow, and border-radius (which you can use to create rounded corners on div tags and other elements).
When you add a property to the CSS Properties pane, a little arrow appears. Click on it, and you’ll open a dialog that makes it easier to specify properties, such as the corner radius settings that create rounded corners.
4. Create Cool Effects By Using CSS Transitions
You can create dramatic effects using Transitions, such as fading from one image to another or making a drop-down menu open slowly, instead of in one abrupt action. These kinds of effects are possible because you can use CSS 3 Transitions to change a style property from one state to another, over a specified period of time.
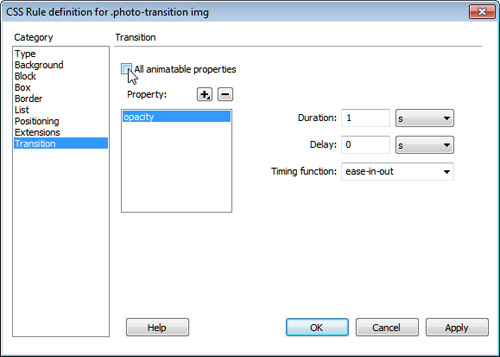
Dreamweaver CS6 adds two new features to help you create CSS 3 Transitions: a new CSS Transitions panel, and a new Transitions Category in the CSS Rules Definition dialog. You can open the CSS Transitions panel by choosing Window > CSS Transitions. To create a new transition, click the plus (+), and the New Transitions dialog opens.
You can further refine your transitions using the CSS Transitions category in the CSS Rule definition dialog. This dialog includes an All animatable properties checkbox, which you can use to apply the Transition to multiple properties at once.
5. Use Live View to Preview CSS 3 Features in Dreamweaver
One of my biggest frustrations with Dreamweaver CS6 (and version 5.5 for that matter) is that design view, which is supposed to show you what your web page will look like in a web browser, is woefully outdated. As a result, when your pages are displayed in design view, you won’t see any of your CSS 3 styles – no drop shadows, no rounded corners, no fancy fonts. Still, it’s better than Design view.
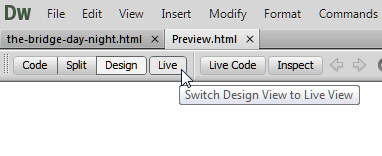
To get a better idea of what your page will really look like to your visitors, click the Live button at the top of the main workspace and Dreamweaver will display most CSS 3 features. Unfortunately, many of Dreamweaver’s editing functions don’t work in Live View, so you’ll need to click the Live button again to go back to editing your page. With a little practice, you can get used to compensating for the design differences between these display options, but it does make Dreamweaver’s Design view a less than ideal place to, well, design web pages.
Although Live view is helpful, remember that you should also test your web pages in all of the most popular web browsers. You can test your pages in multiple versions of browsers using Adobe’s BrowserLab, which you can use by choosing File > Preview in Browser > Adobe BrowserLab.
6. Create Mobile Applications with PhoneGap
Yes, you can actually build an app for a smartphone from within Dreamweaver (although really complex apps, such as interactive games or eCommerce systems still require heavy-duty code skills that are beyond Dreamweaver’s reach). Dreamweaver CS5.5 added support for PhoneGap. Version CS6 takes it to the next level with the integration of the PhoneGap build service.
Using PhoneGap, you can create mobile application designs easier than ever, and then turn your designs into native apps for iOS, Android, Blackberry, WebOS, and Symbian. Once built, the native apps are saved in the cloud, but you can download each application to publish them to any of the app stores you have access to.
Note: if you build native apps for the iPhone or other iOS devices, you have to have an Apple developer’s license (and a Mac) to publish them to the iTunes App store.

DW CS6 fluid grid idea is marvelous but I have gone back to 5.5 because of Java script errors popping up when I do ANY action of Any Page on Any designed site.
I spent 8 hours looking for ways to get a solution and Adobe’s instructions are a masterpiece of convolvulated reasoning and explanations which DO NOT solve the JS popups.
So my future designs are going to be in 5.5 even though I admire the fluid grid idea very much.
Sorry to learn you’ve had such trouble with version 6. I haven’t seen a Javascript errors like you describe, but different builds on different operating systems can perform differently. If you want to try upgrading, consider doing so after you upgrade your operating system and with the most recent updates to Dreamweaver. Remember, Adobe is constantly making changes and releasing updates so regularly updating your program (which is free between versions) can make a big difference.